

Some days, it seems like our entire workday is filled with manual tasks such as passing information back and forth between people or departments. It’s tedious work that’s open to problems like losing a request or not having all of the necessary information to quickly solve issues. If you’re using Microsoft 365, you can automate the process by creating a submission form that automatically passes updates via a Power Automate flow and let the system take care of these tasks.
In this tutorial, I’ll show you how to create a simple solution for this scenario that involves Microsoft Lists, Microsoft Forms and Microsoft Power Automate. You’ll also need to be part of your organization’s SharePoint environment. If you have these apps, then you’re on SharePoint even if you don’t realize it, but you might need to talk to your administrator about your current user permissions.
For this tutorial, I’m using a Windows 11 64-bit system. All three apps we’re talking about are free with some Microsoft 365 licenses.
Jump to:
- Why use Microsoft Lists instead of Excel?
- Setting up your Microsoft Lists feed with Microsoft Forms
- How to create a flow using Power Automate
- How to update your list in Microsoft Lists
- Putting it all together
Why use Microsoft Lists instead of Excel?
Microsoft Lists saves all input values to an Excel workbook file, behind the scenes. If that’s the case, you could use an .xlsx file and skip the list altogether.
SEE: Here’s how to sync Microsoft Lists with Microsoft Excel.
If you know for certain that users know how to use Excel, it’s okay to bypass Microsoft Lists. However, reasons to use Microsoft Lists instead include:
- You might find users prefer a simple form that leaves no room for errors.
- Users might inadvertently ruin the Excel file in some way, and while there are ways to protect Excel data, creating the sheet and protecting it will take more time than creating a list.
- Power Automate can easily find your form and list, but finding an Excel workbook that might be in any site will require a bit more nosing around on your part — the file must be in a SharePoint site or One Drive.
It’s up to you, but Microsoft Lists is generally quicker and easier to use.
Setting up your Microsoft Lists feed with Microsoft Forms
Let’s suppose you track IT issues. Instead of losing requests through an archaic system of phone calls, texts and email, we want a system that collects and stores IT issue requests automatically.
SEE: Learn how to use Microsoft Lists with Power BI.
To that end, we’ll create an online form using Microsoft Forms that allows users to submit a problem. Power Automate will update a list created in Microsoft Lists when a user submits a request using the form. Then, IT will use this list to track issues.
The first piece of this solution is the list IT will use to track issues.
How to create a list in Microsoft Lists
The easiest way to get a list up and running in Microsoft Lists is to import content from an existing source or use one of the app’s templates. Feel free to work with your own data, but for this demonstration, we’ll use a template to reduce the amount of preparation:
- Sign-in to your Microsoft account, and use the App Launcher to launch Microsoft Lists.
- In Microsoft Lists, click New List at the top.
- In the resulting window, click Issue Tracker (Figure A).
Figure A

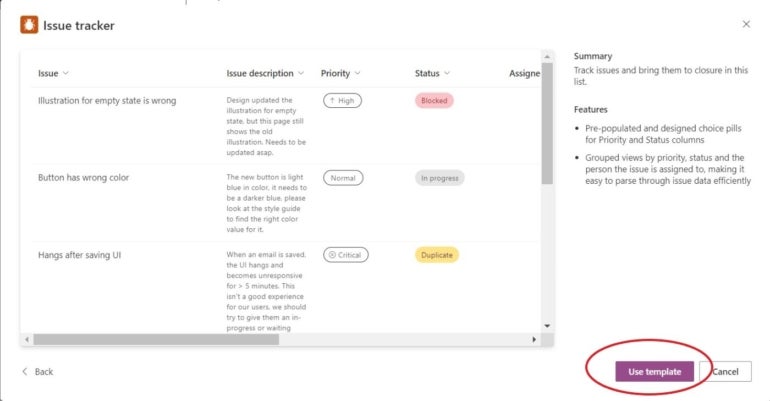
- The next window displays the template structure with sample data (Figure B). Take a moment to review the columns. When working with your own data, you might add or remove columns, but that’s much easier than starting from scratch. Click Use Template.
Figure B
- In the next window, enter information about the new list. You can change the name, add a description and change visual properties (Figure C). For demonstration purposes, you can keep the defaults, but I entered a simple description.
Figure C
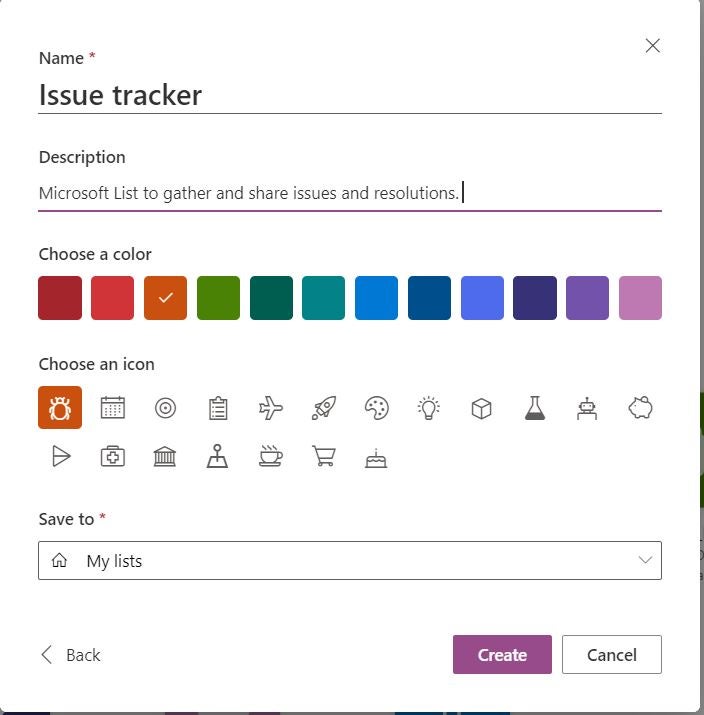
- Click Create to create the list shown in Figure D.
Figure D

Before you leave the list, here’s a tip that will serve you well when using Power Automate with SharePoint files: I recommend you copy the SharePoint URL to the Clipboard or into a text document; you might need it later.
- Click the Settings gear in the top-right corner.
- Click the List Settings link.
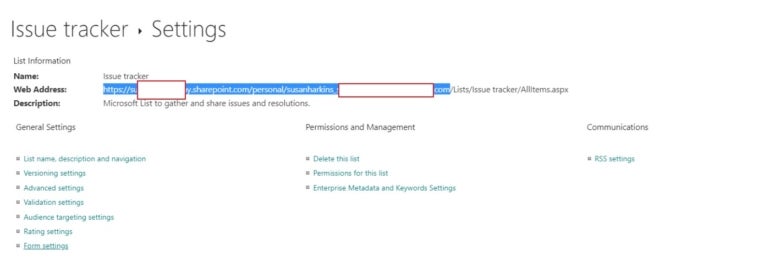
- Copy the Web Address shown in Figure E. Copy only the SharePoint address, up to but not including the /List component in the path.
Figure E
At this point, it’s fine that the list is empty. We’ll use Power Automate to update the list.
How to create a submission form using Microsoft Forms
We’ll be using Power Automate to update the list you just created, but we need data to make this work. There are many ways to gather data into a Microsoft Lists list, but Microsoft Forms is one of the easiest to use.
If you’re not familiar with it, don’t worry. Once you’ve worked through this simple example, Microsoft Forms might become one of your favorite apps.
With your list in place, let’s create a form to collect data for two columns:
- Click App Launcher, and choose Forms. If necessary, click More Apps at the bottom of the first apps list. You can access Apps Launcher from your new list, so you don’t need to travel around trying to find it.
- In the next window, click New Form.
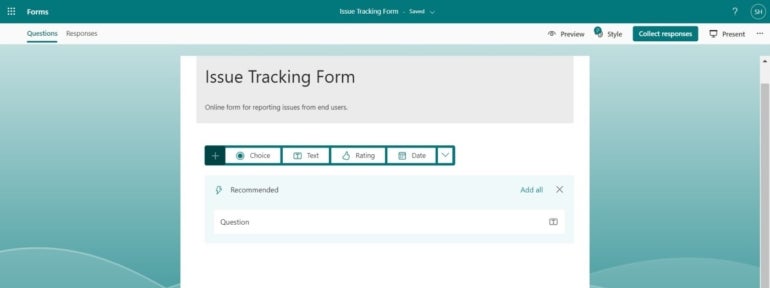
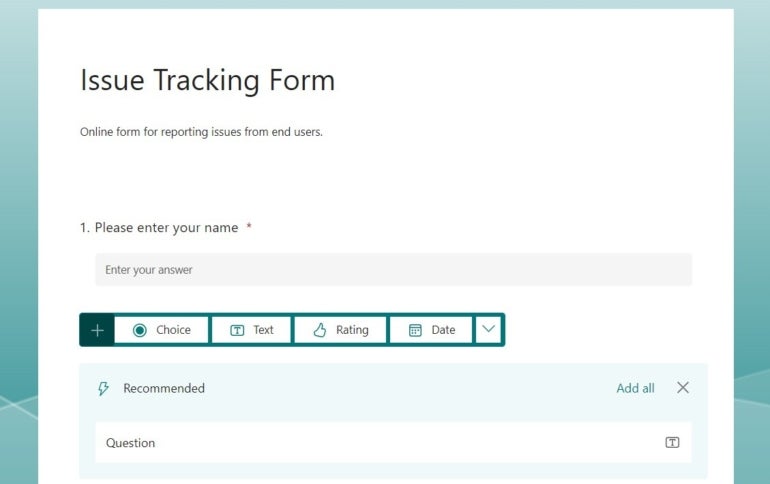
- In the following window, name the form, and enter a meaningful description (Figure F).
Figure F
- Click Add New, if necessary to display options, and then define the first control as Text by clicking the Text option.
- Enter a title for the first question: Please enter your name.
- Click the Required setting (Figure G). By selecting this, the form won’t send collected data until the user enters a value. This forces the user to send all the information you need in the first request, limiting the number of callbacks per ticket.
Figure G
- Add a second text field for the issue description, using the following text: Please describe the issue you’re currently experiencing. This time, enable both the Long Answer and Required settings.
At this point, you can click Preview to see how the form will look to users. Preview offers two views: Computer and Mobile.
For our purposes, passing two text values is enough to get the gist of how Power Automate and Microsoft Lists can work together. The next step is to build a Power Automate flow that transfers the information from the form to the list.
How to create a flow using Power Automate
We currently have a form to collect information and a list to store that information. Now, let’s create a Power Automate flow to move collected form data to the list.
SEE: Speed up your app development by building flows in Microsoft’s Power Automate with AI.
We need a flow that a user triggers when submitting data via the form. Here are the steps to create that flow:
- Using the App Launcher, launch Power Automate.
- Click Create in the left pane.
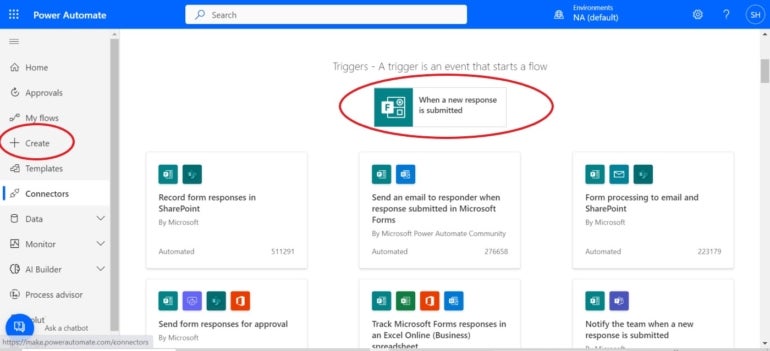
- Browse down, and click the Microsoft Forms connector.
- In the first card, choose the new form from the When A New Response Is Submitted dropdown (Figure H).
Figure H
- Click New Step.
- For our purposes, enter get response details in the search control to update the list of actions and triggers (Figure I). Click Get response details in the resulting list below.
Figure I

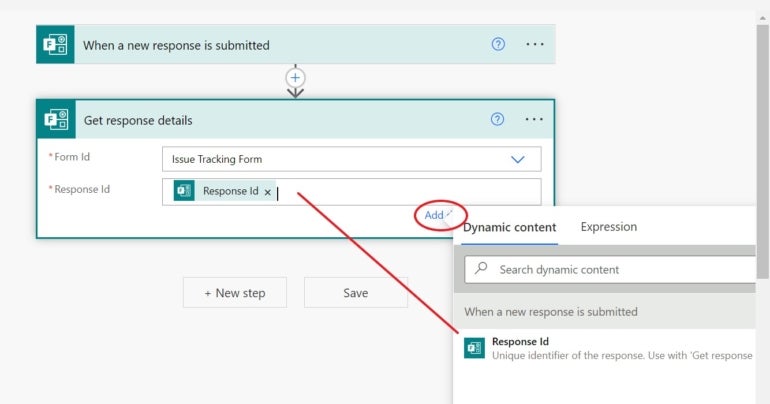
- In the flow, choose the issue tracking form you created earlier from the Form ID dropdown.
- The Response ID will be unique for each form submission. For this reason, we’ll use dynamic fields. Click the Add Dynamic Control hyperlink if necessary to display a list of possible settings. There’s only one, so click Response ID to enter it as the Response ID value (Figure J).
Figure J
- Click New Step.
- In the next search control, enter Create Item.
- Click Create Item in the lower pane, making sure it’s a SharePoint action. Microsoft Lists doesn’t have a SharePoint connector, but Microsoft Lists and SharePoint lists are the same internally, so the SharePoint connector also works with Microsoft Lists. This choice identifies what Power Automate will do with the passed response values — it will create a new item in the Microsoft Lists list created earlier.
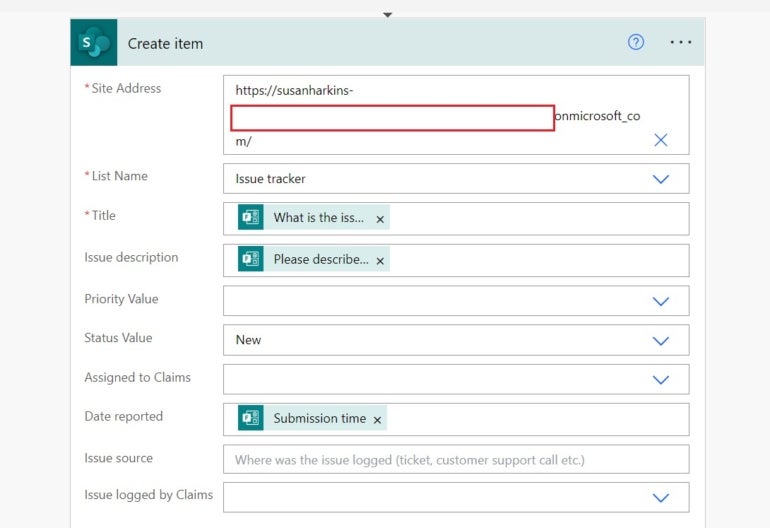
- Choose your SharePoint site from the Site Address dropdown. If your SharePoint site isn’t listed in the dropdown, copy the URL you saved earlier into this control. Alternatively, you can return to your list and get the URL using the Settings if you didn’t copy the URL earlier. Remember to delete everything from /Lists to the end.
- Using dynamic fields, map the form fields to the list fields (Figure K).
Figure K
- Click Save.
At this point, we have three components, and we’re ready to use them to automatically move collected form data to a list.
SEE: You can use Power Automate to streamline routine tasks.
How to update your list in Microsoft Lists
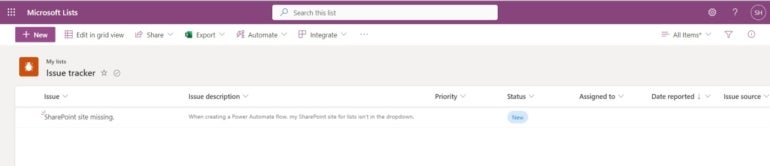
Now, we’re going to use a Microsoft Forms form to update a list in Microsoft Lists. We’ll do this by triggering a Power Automate flow when the form submits new data. To see how they all work together, open the issue tracking form in preview mode, add the values such as those shown in Figure L and click Submit. If the form tab is still open, click the tab, and then, click Preview.
Figure L

Using the App Launcher, open the issue tracking list. If your list tab is still open, click the tab to view the list shown in Figure M. As you can see, the flow copied the data you entered into the form to store in the list.
Figure M
Putting it all together
Using three components to pass IT issues might seem like overkill, but if you’re in a busy organization, it doesn’t take long for calls, texts and emails to start falling through the cracks. Once you’re familiar with Power Automate, you can create a simple solution such as this one in under 10 minutes.
Many organizations have a ticket-type tracking file. And that’s essentially what we’ve created here; although, there’s no ticket number exchange, which is something you might want to include. Or, you might want to send an email to someone on the IT team every time a record is added to the list. These are things you’ll want to consider adding when customizing a flow for your own work.

Subscribe to the Microsoft Weekly Newsletter
Be your company's Microsoft insider by reading these Windows and Office tips, tricks, and cheat sheets.
Delivered Mondays and Wednesdays