


Microsoft Word’s recently improved image settings makes working with images in Word documents easier than ever — if you know how to keep them where you want. Learn how to use Word’s new options that improve image placement and movement.
I’m using Microsoft 365 on a Windows 10 64-bit system, but you can use earlier versions; however, I can’t promise that the path to the settings will be the same. You can download the demonstration .docx and .doc files, but any Word document will do. I used Word’s RAND() function to fill a few pages with text. Word for the web will display images and let you set wrapping options, but the more advanced options that keep images in place aren’t available.
I’ll be working with image files, but you can work with most graphic files. I’m using a stock image from Microsoft 365’s collection; you can insert your own images.
SEE: Software Installation Policy (TechRepublic Premium)
How do images move in a Word document?
You want images to move freely within a Word document when you’re creating that document – that’s why the default settings are set to allow movement. When you insert an image, Word assigns the layout property In Line with Text (Figure A).
To see the layout properties, click the small Layout Options icon next to the image’s top-right corner. As you enter, delete and rearrange text, the image can go almost anywhere.
Figure A

Because this default is so flexible, you will usually want to work with text and figures separately at first. Work with the text until it’s ready to go, but don’t put effort into arranging it, because inserting the images will undo most of your efforts in that area. When you insert an image in Word, resize it, crop and make any other adjustments necessary before positioning it.
When the image is ready, insert it near the text it complements and drag until it’s where you want it to stay – you may have to resize it. At this point, you must decide if you want to retain the In Line with Text layout property, which is great for moving images around but not so great for keeping the image where you want it. Often, all you need to do is change a wrapping property. Once the image is in place, it’s time to secure it in your Word document.
How to anchor images to text in Word
It’s reasonable to think images should flow with the text when the images relate to the nearby text. When this is the case, you may choose most wrapping options other than In Line with Text and Word will automatically anchor the image to the surrounding paragraph. Word treats the image as a text character, so if you move the paragraph, the image goes with it. If you delete the paragraph, Word will delete the image too, so be careful.
This happens when you change from the inline setting to any other wrapping setting (Figure B). If selecting the image displays that anchor, you know it will remain with the text, honoring the set wrapping property. This is thanks to Move Object with Text.
If you don’t see the anchor, be sure to select the picture. If you still don’t see the anchor, click the File tab, choose Options, select Display and check the Object Anchors option in the Always Show These Objects on the Formatting Screen section.
Figure B

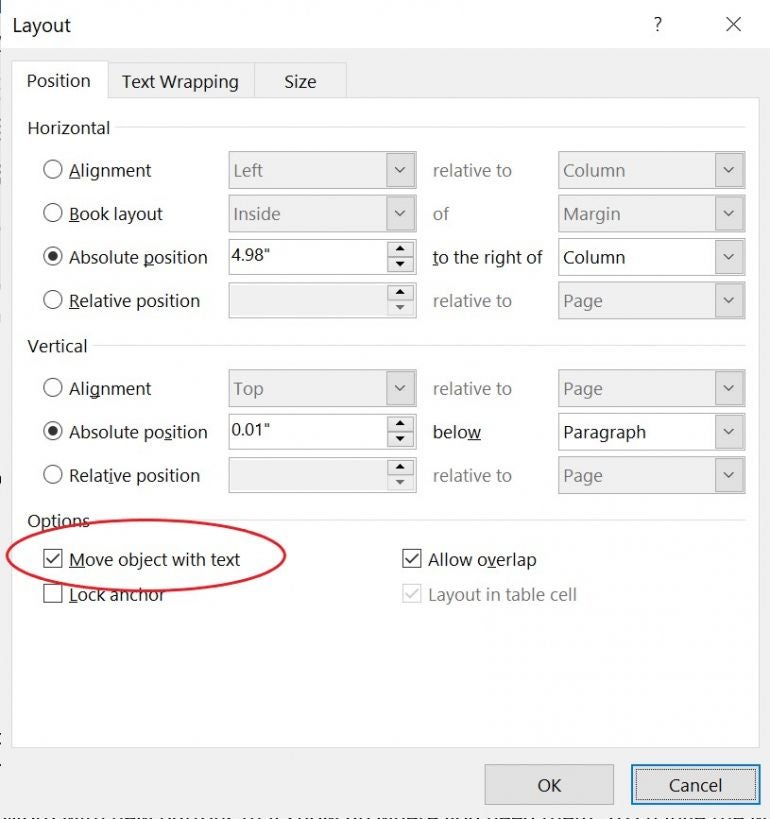
To set this option manually, click the See More link at the bottom of the Layout Options list and click the Position tab (Figure C). We’re only going to discuss two of the settings offered on this tab: Move Object with Text and Lock Anchor. We’ve already discussed the first, so let’s move on to Lock Anchor.
Figure C
By default, the wrapping options except inline set the Move Object with Text property. You can still move the picture to another paragraph manually.
If you check the Lock Anchor option, no one can accidentally move that image to another page. Note that this option does not lock the image with the paragraph. You can still move the image on its current page. In addition, you can cut and paste the image to another page, taking along its properties.
How to lock an image to a page position in Word
Occasionally in Word, you’ll want an image to stay right where it is, regardless of what you do to the text and other images. This is easy to accomplish by following these steps:
- With the picture selected, click the Layout Options icon.
- Near the bottom of the list, click Fix Position on Page (Figure D).
This option doesn’t completely lock the image in place, but it does keep it from moving as you further modify the Word document. If you delete or insert a paragraph above the picture, it won’t move. You can still drag it anywhere you like unless you’ve enabled Lock Anchor.
Figure D

How to change the default in Word
You should change the In Line with Text default setting if you know ahead of time that you will change to another wrapping option for most of your images. To change the default, follow these steps:
- Click the File menu and choose Options.
- In the left pane, click Advanced.
- In the Cut, Copy, Paste section, click the Insert/Paste Pictures As dropdown to see the different wrapping options (Figure E).
- Click OK to return to the document.
You don’t have to choose another wrapping option right now, but you might want to experiment later.
Figure E

In Microsoft Word, knowing how to keep your images where you want them will save you time and frustration as you continue to insert content and images.

Subscribe to the Microsoft Weekly Newsletter
Be your company's Microsoft insider by reading these Windows and Office tips, tricks, and cheat sheets.
Delivered Mondays and Wednesdays